
 By Dennis Livesey
Now that I have been a photographer for some time, I have refined the process of getting ready for a train shoot day by having a clear set of procedures. Not only does this result in efficiency, but there is also pleasure in following the routine. The roots of my method come from my background in motion pictures.
Normally before any movie job, I would get a “check-out,” a paid day(s) where I would go to the camera rental house and go over the camera and all the gear that I was to work with. The importance of this cannot be overemphasized; accuracy and consistency were imperative to do it correctly. If anything was missing or didn’t function on the shoot, the work of an entire crew of five to 100 people, a whole lot of somebody’s money, and my job (as well as my reputation) would go down the drain.
Over this career that lasted decades, I followed this methodical procedure hundreds of times. As my career progressed, I made a check-out list so I did not forget the slightest detail. It will come as no surprise that I apply the same type of check-out procedure the day before I have a railroad shoot. The last thing I want is to travel a great distance, expend precious time and expense, and heighten other people’s expectations only to find I forgot a memory card or to charge the batteries. Nothing will ruin a good train day (like any pro movie day) when it turns out your camera is a dead duck.
So, the following is what I do. It is my hope that you get an idea or two so that your next day trackside will be a fruitful one.
Pre-production
First off, I use a Brother PTouch labeling machine to label every piece I have with my contact information, as well as numbers or letters for items that are in multiple. This means not only the cameras and lenses, but also the batteries, memory cards, lens shades, and quick release plates. This may seem a little insane, but by doing so I have dropped the missing rate to near zero and maintained my sanity.
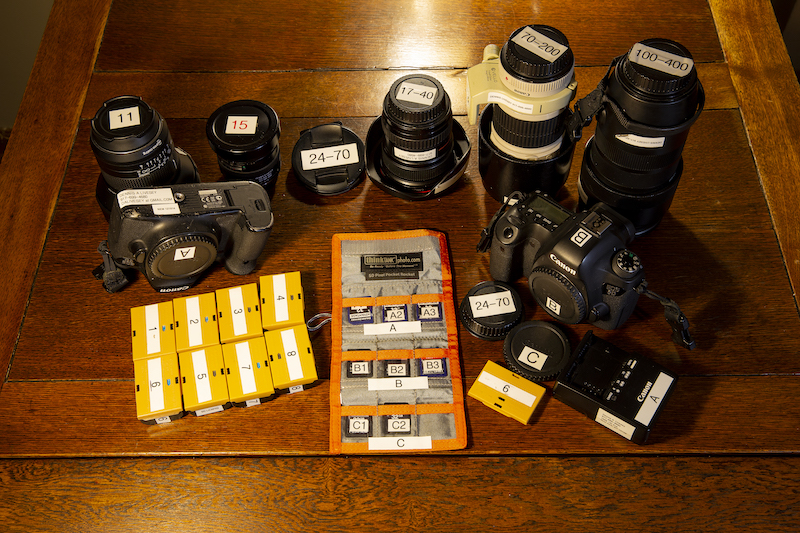
One time, an old friend saw my three-camera setup and asked, “Why did you label them A, B, and C?” I answered, “So I know which one is which!” This way, each is assigned its lens, its place in my camera bag, and on my body. This eliminates thinking about which camera is which (with multiple cameras, this takes up more time than you think) and helps pinpoint any issues that arise with the camera, lens, card, or battery.
I have nine Canon (OEM, or Original Equipment Manufacturer) LP-E6 batteries, three for each camera. I know that even on a cold day and shooting hundreds of images with each camera, I will collapse from exhaustion before my camera batteries do. I label each battery with its serial number which is registered in the Canon 6D’s battery menu. I have them and their covers labeled with matching numbers. I have the date I purchased the battery as well, so that I can corroborate with the 6D’s battery performance meter to know when it is time to replace it. Note — I buy only Canon OEM batteries, even though I pay through the nose for the privilege. Yes, there are less expensive batteries out there. However, I find although they offer value and reasonable performance, they are not in the same performance league as OEM. I find OEM batteries last longer in the camera, as well as in years of service, and do so with a consistent performance. It drives me crazy how third-party batteries have performances that are all over the map and always die just before a run-by. Take it from me — in the long run, quality saves.
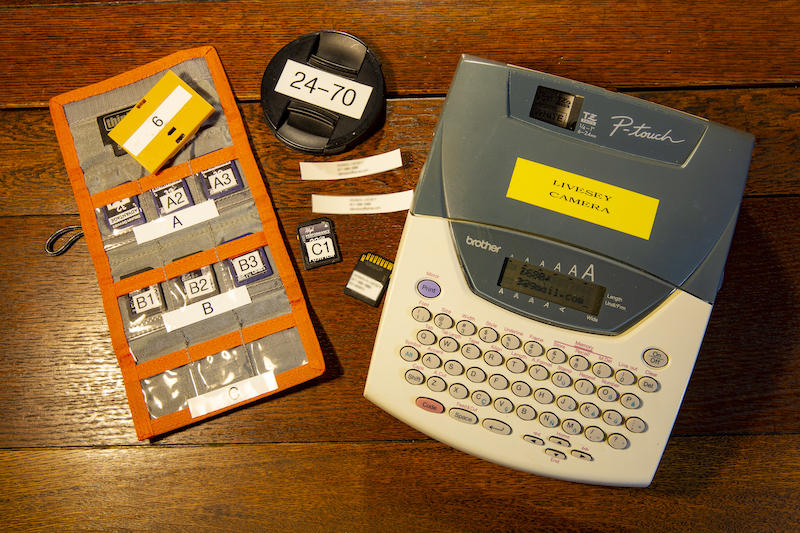
A Brother PTouch labeler is used to generate labels for all the equipment, including labels with contact information for the photographer should anything get lost in the field.
I have nine UHS-I SDHC memory cards (the best the 6D uses), again three each per camera. I label them A1, A2, A3, B1, B2, and so forth, along with the date of purchase and my name and cellphone number. The date is so I know when I should replace them, while the contact information provides a better chance of getting the card back if lost. The night before a shoot day, I put in freshly formatted (thus empty) cards; in the A camera I put in card A1, the B camera gets card B1, and you can guess which card the C camera gets. When the shoot is over and the cards are out and ready for downloading, I know as easy as A-B-C which came from which camera. As you can see looking at my memory card wallet, the cards have their own pouch. “A place for everything and everything in its place,” as my dad Herbert would say. The wallet lives in just two places — the left side pocket of my camera backpack attached to a safety strap and on my computer desk under the monitor. That way I can always find it.
My nightmare is an unlabeled card with once-in-a-lifetime images getting misplaced, lost in the folds of a bag or coat or car seat crevice, or the worst, left in the ballast of some location. (Perhaps just as bad is having a pile of unlabeled cards lying around, of varying capacities with images still on them. Those are clutter to me so I empty and dispose of them.) I do this because there is nothing so utterly important as my camera memory cards. Think for a moment about how important these are. These cards are the repository of all the time, money, and effort you took to get these images — images that are now more priceless than money can buy. If you went on a huge trip and you were told upon your return, “Give up your camera or your cards,” which would you part with?
I also have a method for putting cards in the pouch. When the card is empty, it’s right side up; when it has images it’s up side down; and when images have been downloaded and the card is ready for formatting, it’s backside out.
I also label my lens caps and hoods with my name. The caps get the millimeter of the lens they go with (17–40, 24–70, 70–200, and so on). Even when the caps are the same size, they still get assigned to just one lens only. I label the lens mount caps, as well as what lens they are assigned to. I am sure you are asking, “Isn’t one lens mount cap as good as another?” Well, at wrap, you will quickly know which one, if any, is missing and that helps in finding it. Doing this, I have not lost any caps in about 10 years. You want to protect your expensive lenses, right? So, label the caps. Don’t believe the efficacy of this? Well, I dropped a lens hood once in Hawley, Pa. One of the railroad’s people found it, saw the contact information and it was back home in a week. Knowing that your gear is ready to go, you have more time and energy to create. And that is what it is all about.
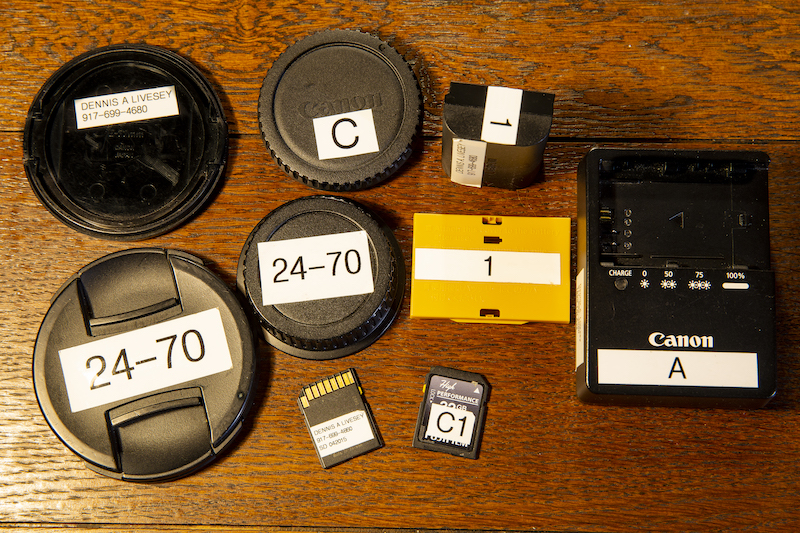
Everything from lens caps to quick release plates to battery chargers gets labeled. With everything labeled, you can tell exactly which piece of equipment might have gone missing.
The Check-Out List
For your convenience, here is the list I use.
(1) Clean the camera body and check the sensor. (Use a nearly dry damp cloth for the body. What I do for a sensor check and cleaning is for another article.)
(2) Clean the lens bodies and glass elements. I use a combination of glass cleaner, micro-cleaning cloths, and lens pens for cleaning the glass.
(3) Clean the filters.
(4) Charge the batteries for the camera, flash, phone USB power bank, radio, flash triggers, and flashlight.
(5) Download and format the memory cards. This gives the maximum number of photos per card and makes organizing photos easier with just one shoot per card.
(6) I put cards and batteries in the camera and fire them up and go to the Canon Quick Control menu. There, I check to see that all three cameras are set to the same parameters.
This is my camera setup: mode M (manual); shutter 500 (1/500); aperture 5.6; ISO 800; clock time correct; GPS on; highlight warning on; RAW (no JPEG); AF (autofocus) set to servo; color set to standard with automatic white balance; focus point selection on manual; single frame (one frame when the release is depressed); evaluative meter (analyzes the light in the entire frame for metering); and back button focus. Making sure the cameras’ clocks have the same time (something the GPS will do when working) pays dividends when the images are downloaded. This way, all the shots I take in one place with the different cameras/lenses fall into chronological order in the folder and can be easily found.
(7) As a final camera test, before I zip the cameras in the bag, I take a test shot with each and chimp to make sure they can take a picture. Then I remove the battery and leave it next to the camera body in the camera bag. (GPS is on and will drain a 6D battery overnight.)
To make getting out of the car and shooting as fast as possible, I put my cameras into my Think Tank StreetWalker backpack with their lenses on and cards in. At the location, I take the strap out of the bag, put it on, load batteries into the cameras, turn them on, remove the lens caps, and then clip the cameras onto the camera strap and “camera’s up!” (as we say in the movie biz).
(8) Check accessories including the tripod (does it have the quick release plate?), camera strap, micro cloth terry towel for precipitation wipe-off, foul weather gear, sturdy shoes, hat, gloves, water, energy bars, car charger for phone, and a car GPS unit.
Final note — I shoot using what is known as “Back Button Focus.” This technique, which is available for most any camera, activates the electronic focus when you press a custom button, usually on the back. I call this “Command Focus” because that better describes the purpose. I do this because whenever I have used the camera in full auto-focus (AF), inevitably my type of composition makes the auto-focus render perfectly sharp the tree or building or whatever I have placed in frame for composition purposes and not the train. Thus, I select the center AF point, aim it at the spot on the rail where I want the number boards sharp, press the designated custom button, and the focus is set. No worries about it changing at the last second because something comes into frame. If doing several shots of a run-by, I select a point in an upper third area, and when the locomotive is under that point, I continuously hold the button so the lens does constant AF. This is also good for flash night shots. Put a flashlight at the spot you want the focus, on, press the button, and the focus is set.
Check-In
After the shoot, I pull out the card wallet, then pull the cards from the cameras and directly put them in their pouches in the wallet. (They can be lost at this time. Don’t ask how I know.) I then plug in the batteries to charge. If anything got wet, those pieces get cleaned. When done, I put it all back and I’m ready for the next day.
I wager some of you are exhausted seeing all this and are shrugging, “This is so not me. I have one camera, one lens, one battery, one card.” However, I hope I have motivated you to at least to put your name on your camera. All you have to do to give yourself more POM (Peace of Mind) before your next shoot day is use some of my ideas for your own check-out.
“It’s a wrap!”